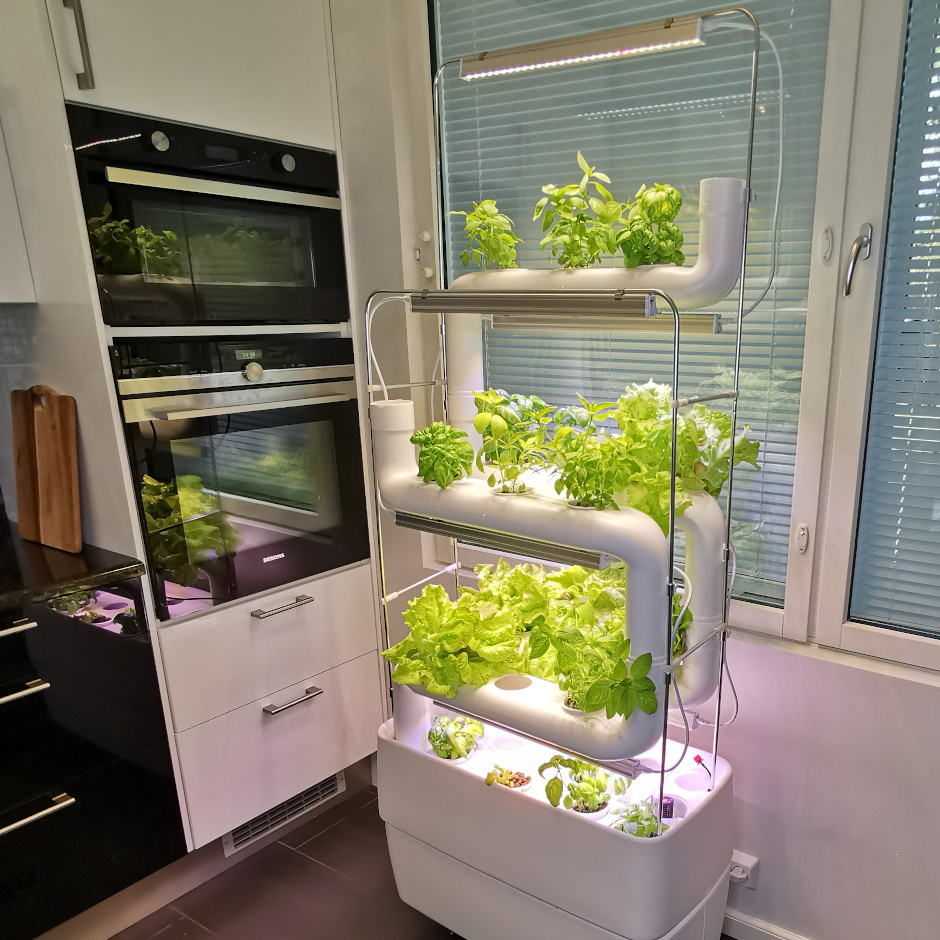
Frontpage How It Works Build up the Grow system
Building up The Green Wall and Vertical Garden
Instructions How to build up and to use Green Wall system Supragarden®
Read below the safety instructions and the instructions for assembling the Supragarden Green Wall and hydroponics system:
-
See the pictures and instructions for assembling the Plantsteps >>
-
See the instructions for finalizing and testing the system before use >>>
Instructions for using the Supragarden hydroponics system:
- Instructions for growing food plants
- Measurement and adjustment of plant nutrient water
- Hydroponics nutrients and fertilizers for food plants and green plants
SAFETY INSTRUCTIONS
Please notice and follow these safety and usage instructions when using the Supragarden® system:
|
Assembly of Supragarden® Vertical garden with Plantsteps®
The assembly should be done on the floor or on a another level surface.
With Plantsteps and Supragarden you can design a modular, do-it-yourself, i.e. DIY green wall and Vertical Garden in many shapes and sizes. You can also build an easy green wall using the ready-made Supragarden system package. This instruction is intended for assembling a ready-made green wall system package. The instructions can also be applied to planning and making an individual green wall.
VIDEO: Assebly of water pump and tubing and building up Supragarden 4 model
Plantsteps and Support frame
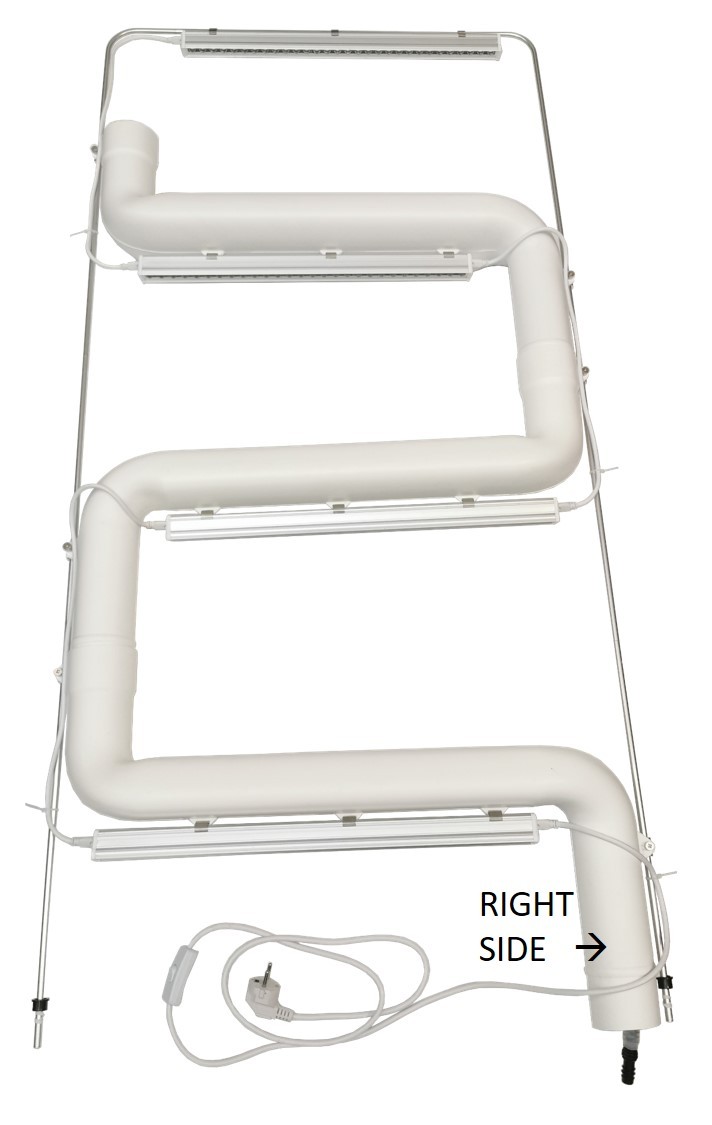
The easiest way is to first assemble the Plantsteps staircase completely ready on the floor or table and then lift it over the already assembled water tank and Nursery level unit. If there are two stairs side-by-side in the grow system (like Supragarden 2+2, 2+3, etc.), connect the stairs to each other with spacers and the connection cable of the lamps only after they have been raised on the Nursery level.
Please note to attach the lower end of the lowest Plantsteps to the right side of the frame. In this way, the frame and Plantsteps are positioned correctly and fit into the holes of the seedling level at the end of the installation.
Connecting Plantsteps together
First, connect the water tubes inside the Plantsteps to each other and then connect the Plantsteps to each other.
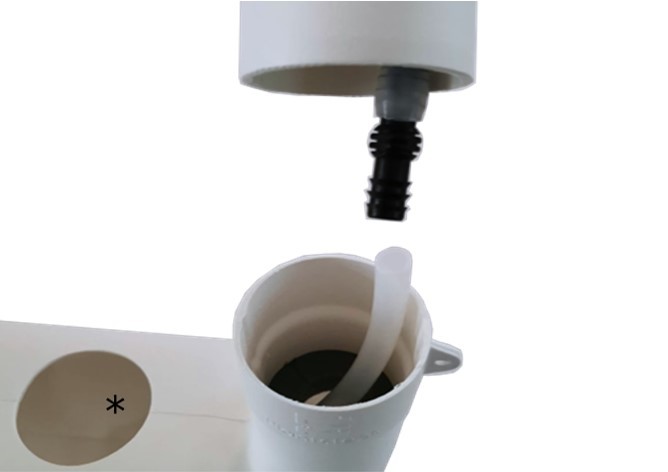
Connecting Plantsteps to each other:
-
Connect the silicone water tube (100 cm) inside the Plantsteps to the tube inside the other Plantsteps with I-connectors. If the hose is not already inside the Plantsteps, put it there, the connector part downwards.
-
A foam collar inside the neck of the Plantsteps prevents water from flowing to the upper edge of the first plant opening (*).
-
Connect the Plantsteps to each other by pushing them inside each other. The connection can be tight.
At the top end of the Plantsteps, there is a net pot with an ears and the L-connector of the water hose attached to it. This hose is slightly shorter, approx. 90 cm. You can also plant a plant in this net-pot. The open opening can be protected with e.g. aluminum foil.
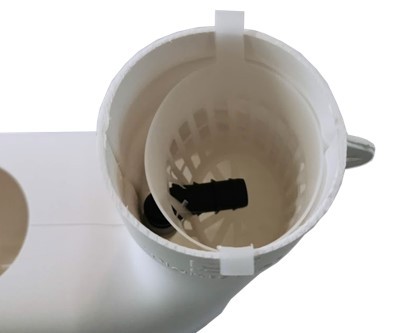
The uppermost net pot has plenty of water and can be used as a growing place for e.g. rooting cuttings.
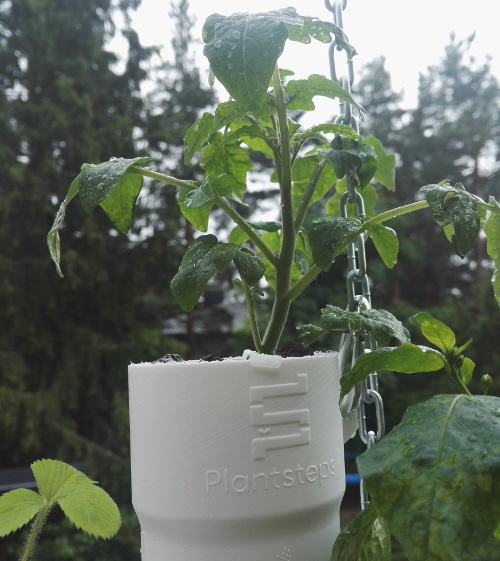
Attaching the Plantsteps to the support frame
-
Open the aluminum support frame by straightening it.
-
Place the aluminum support frame to start flush with the bottom edge of the lowest Plantsteps.
-
Place the lower end of the lowest Plantsteps on the right side of the frame.
-
Try to place the plant ladder horizontally, i.e. at a 90-degree angle to the support frame.
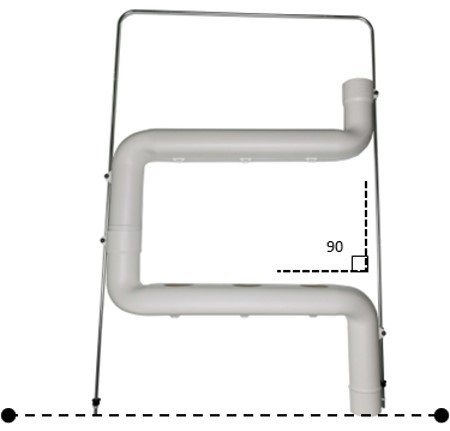
Attach the Plantsteps from the lugs to the aluminum support frame with X-screws. At first, tighten the screws lightly by hand.
The more precise position of the Plantsteps should only be adjusted at the end, when the stairs have finally been lifted up onto the Nursery Level. Then make the final adjustments to the inclination angles of the Plantsteps and tighten the nuts with a screwdriver.
Connecting led grow lights to Plantsteps
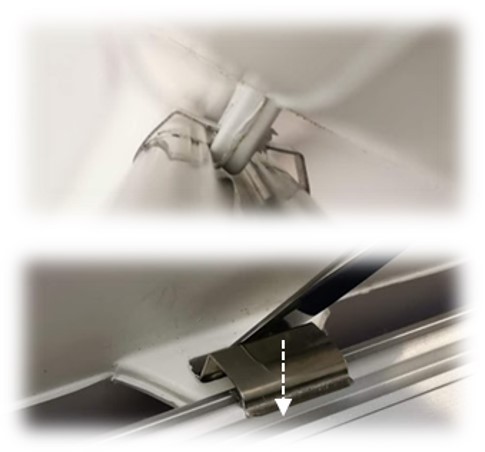
Push the metal fasteners (clips) of the lamps into the bracket openings under the Plantsteps.
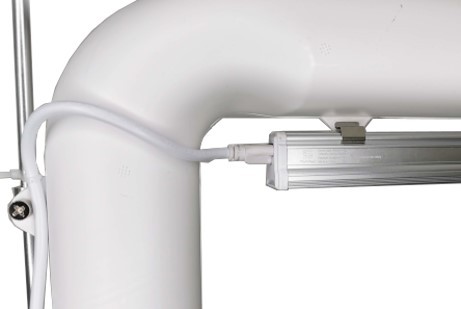
Attach the connection cables to the lamps and click the lamps into the brackets. Help attach the brackets to the lamp, e.g. with a kitchen knife.
Connect the lights to each other with an connection cable and fasten the cables to the lock frame with cable ties.
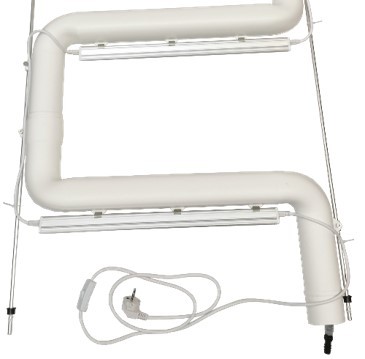
The top plant light is attached to the upper part of the support frame with W connectors:
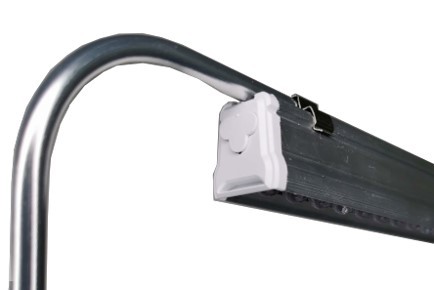
Put the small white lamp end-plug (comes with the lamp) on the end of the last lamp in the chain. If you assemble Supragarden, e.g. 2+2 models, the last lamp in the chain will be at Nursery level:
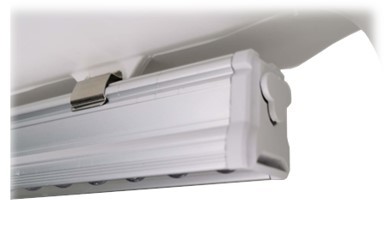
Connect the power cable to the first lamp and test that all lights work.
The Plantsteps staircase is now ready. Now assemble another staircase or proceed to make the connections of the water tank and the Nursery Level, to which the Plant Stairs will be connected.
Connecting the water tank and water pump and assembling the Nursery level
Next, make the connections of the Nursery level and the water pump. On the back of the water tank there are openings for the water pump cable and on the front is the Supragarden logo.
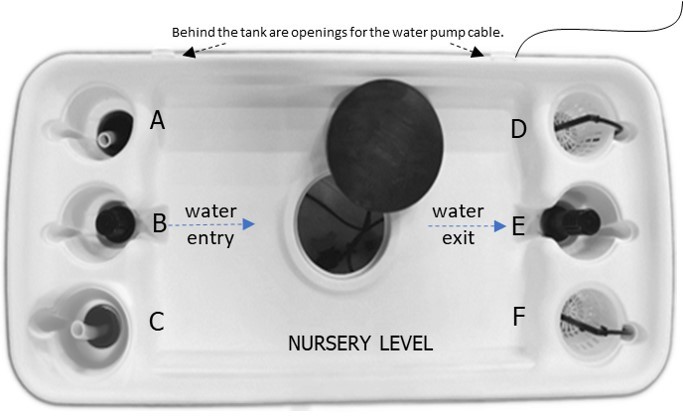
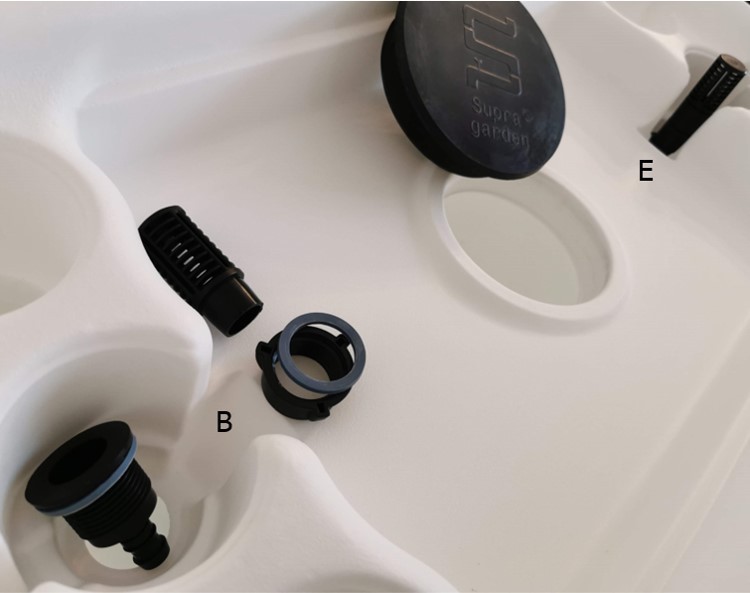
Attach the Nursery level water entry and exit connectors:
-
Attach the water entry - inlet connector (small, 13 mm) to the opening B of the Nursery level
-
Attach the second sealing ring and the mating part of the connector to the connector from below the Nursery level
-
Attach the larger and higher water exit connector (return water to tank) to the Nursery level E opening
Connect the tubes and connectors to the water pump:
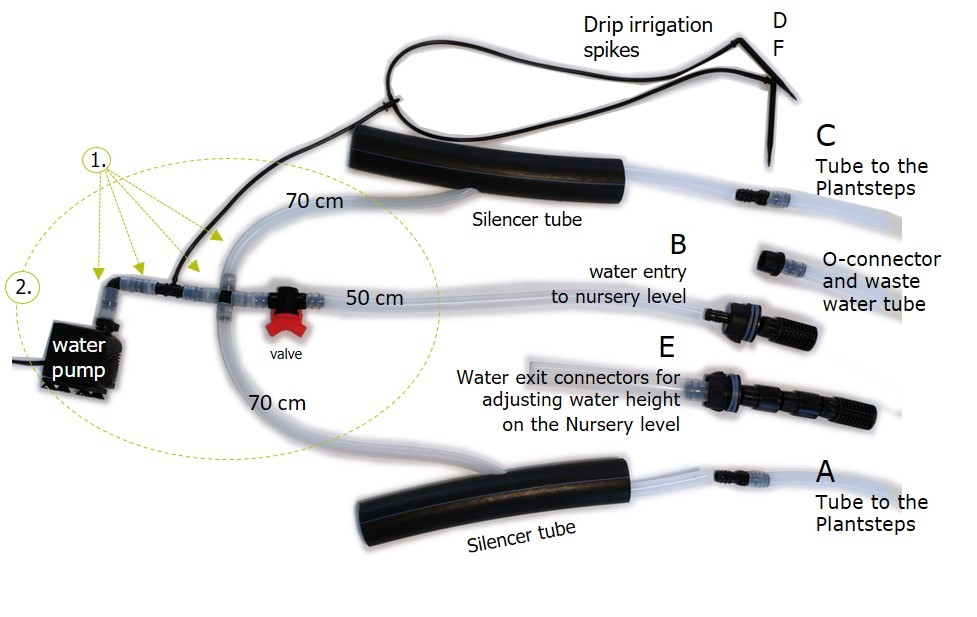
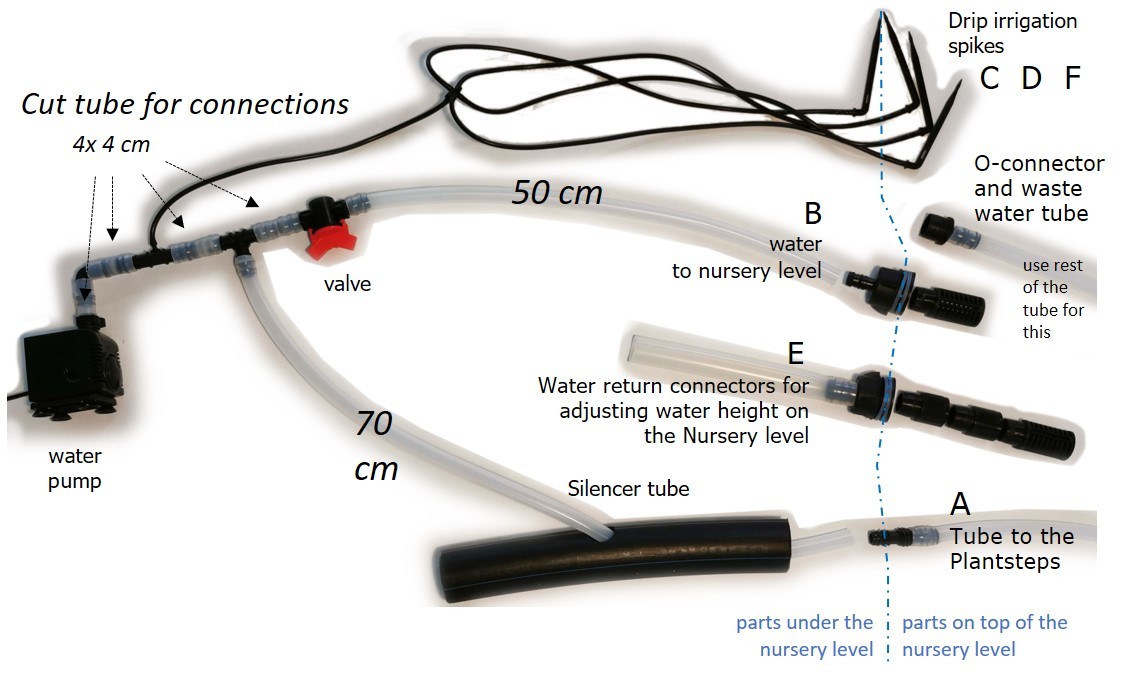
1. First, cut the silicone tubing:
-
Two 70 cm pieces that raise water with Plantsteps
-
50 cm piece for the Nursery level
-
Four 4 cm pieces between the connectors
-
Use the rest of the tubing with the O-connector as a water outlet tube for maintanence
2. Connect the tubes and the connectors to the water pump according to each different Supragarden model picture:
(the pictures are indicative of the route of the tube. Do not put the tube inside the silencer tubes yet)
Supragarden 2+2, 3+3, 4+4 and 5+5 model connections:
Supragarden 2, 3 and 4 model connections:
Supragarden 2+3 and 3+4 model connections:
Supragarden's systems with several Plantstep stairs having different heights need another control valve to regulate the rise of water to the Plantsteps at a lower level.
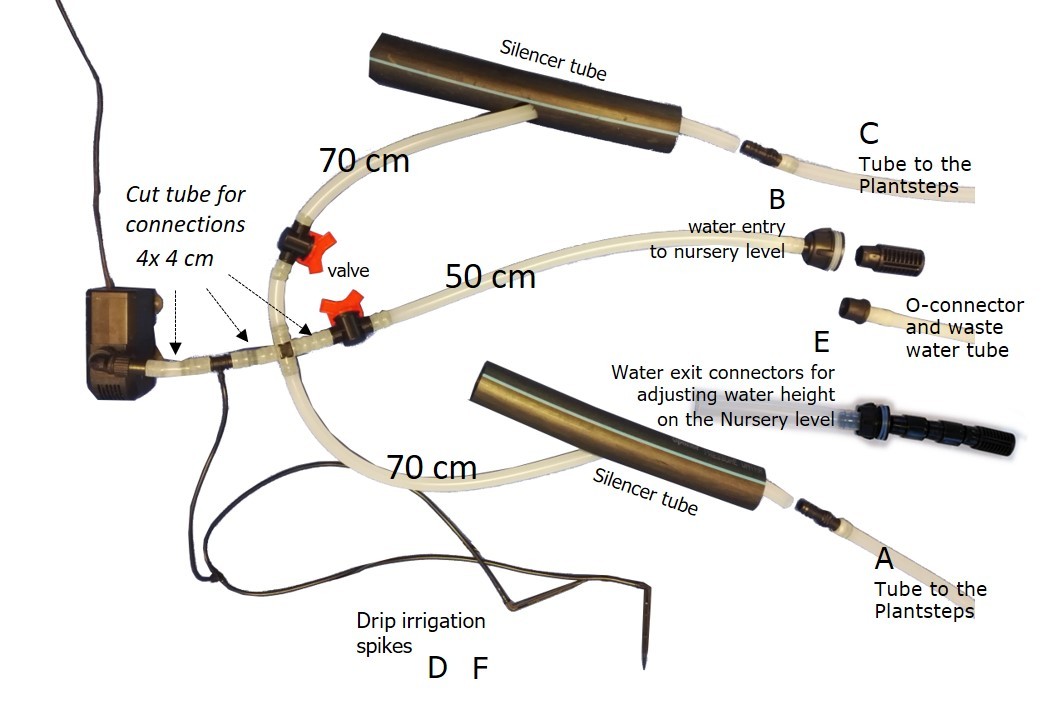
By adjusting the red valve, you can control how strongly the water flows between the Plantsteps and the Nursery Level. Make sure by adjusting the valve that the water rises up to the top Plantsteps.
Supragarden Base unit connection:
There are no Plantsteps in this tubing set-up for Supragarden system. All the plants are at Nursery level.
Connecting only the Nursery level to the water pump:
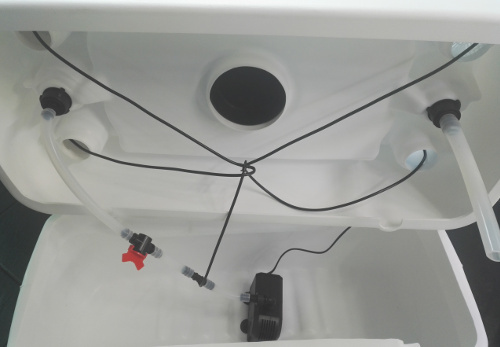
3. Lift the assebled water pump and tubes into the water tank
4. Raise the Nursery Level on top of the water tank .
-
Make sure that the Nursery Level is facing the right way on top of the water tank and that the cable feed-through holes on the back of the tank are aligned.
5. Push the Silencer tubes through the top opening of A and C of the Nursery Level, until they reach the water tank bottom
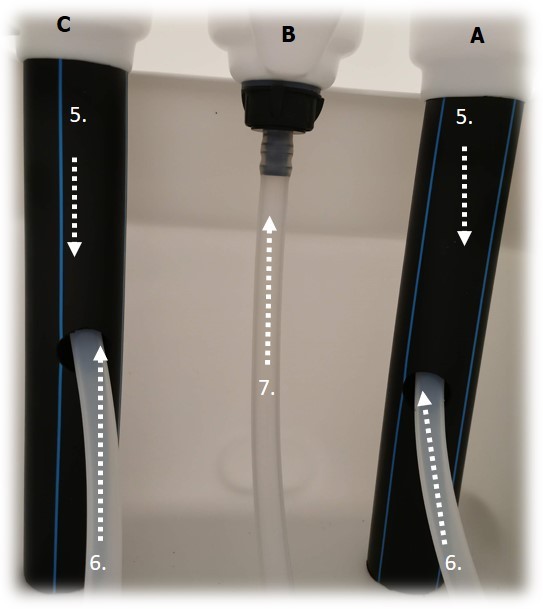
6. Put your hand through the middle opening into the water tank and push the water tubes going up to the Plantsteps through the hole in the middle of the Silencer tube visible up to the seedling level
7. Connect the 50 cm hose coming from the red valve to the Nursery Level B inlet water connector.
8. Lift the drip irrigation spikes from the water tank into the net pots in the openings of the seedling level D, F and possibly C.

The installation of the water tank and the Nursery level is ready. Lift the water tank onto a possible wheeled platform.
Now you can add water and nutrients to the water tank. See more information about hydroponics fertilizers
Installation of the Plantsteps on top of the Nursery level
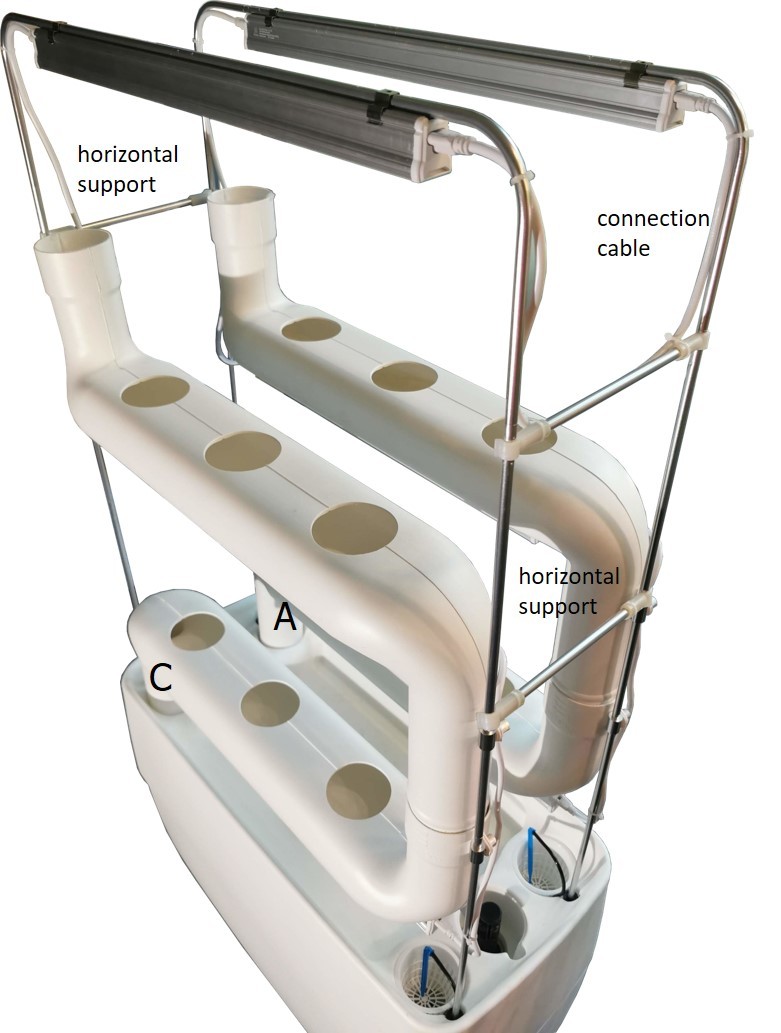
Lift the Plantsteps attached to the frame onto the Nursery level and connect the I-connector of the tube coming from the Plantsteps to the water tube connector coming from the Nursery level corner.
Attach the lowest Plantstep and the frame in it into the corner hole A of the Nursery level.
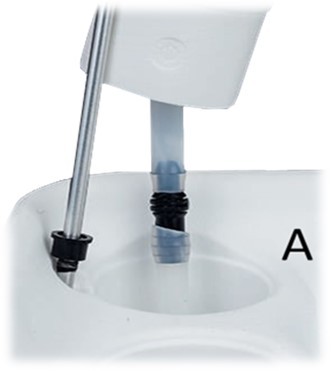
If you are assembling Supragarden with the two side-by-side Plantsteps (e.g. Supragarden 2+2), now attach two side-by-side Plantsteps stairs to each other using horizontal support bars and the connection cable of the plant grow lamps. The connection cable is best routed to the second Plantsteps staircase through the horizontal support bar.
Now you have assembled the Plantsteps, connected the Water Pump to the Nursery level and Plantsteps and raised the Plantsteps on top of the SupraBase unit.
Connect the power cable to the first lamp in the chain and test that all the lights work. If not, check the cable connections.
Finalizing the hydroponics system for growing
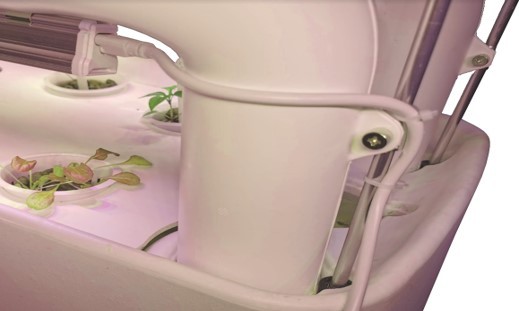
The Hydroponics system is almost ready for use:
-
Adjust the position of the Plantsteps to the horizontal plane and slightly tighten the X-screws with a screwdriver. By adjusting the tilt angles of the Plantsteps, you can affect the height level of the water in each Plantsteps and affect the flow speed and sound of the water. Be careful not to tighten the bolts too tightly.
-
Make sure the lamp end-plug cap is in place on the last grow lamp
-
Make sure there is water in the tank and turn on the water pump and grow lights.
-
Use the red valve in the water tank to adjust the water flow between the Plantsteps and the Nursery Level.
-
Finally, fasten the connection cables of the plant lamps and also the power cable to the frame with cable ties, and you will get a neat and safe end result.
-
Now you can put the Nursery level plant plate in place and put the plants in net-pots into the grow system.
-
Supragarden hydroponics grow system is ready for use
Supporting systems that are more than two Plantsteps high
Systems higher than two Plantsteps must be fixed at the top to the ceiling or wall. Plantsteps and the support frame can carry a large vertical load, but fast growing plants can change the center of gravity of the system and, in the worst case, topple it. Fixing the high system also prevents it from falling over, for example, due to a collision.
Secure the attachment of the Supragarden 3 and 4 systems with their own support frame, with extra support from the upper end of the system with the adjustable ropes that come with the system. Attach one end of the adjustable rope to the top of the Suprgarden system and the other end to the wall or ceiling to prevent the system from tilting sideways.
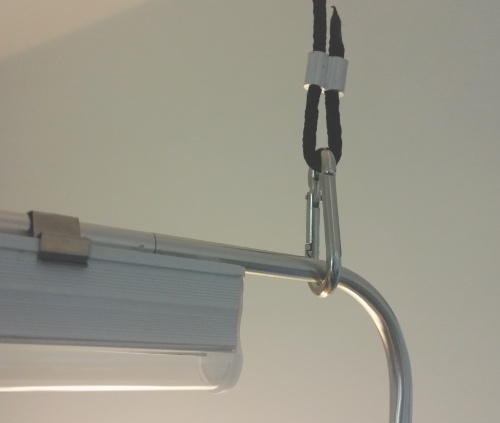
You can also attach the support frame directly to the ceiling with e.g. cable brackets.
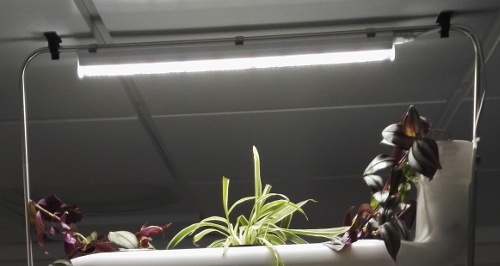
Move plants now to Supragarden system
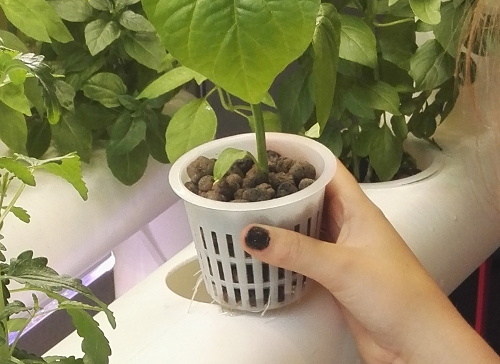
Put the plants in net-pots to the Plantsteps and to the Nursery level.
Use Nursery Level plate to prevent light from entering the water and so to prevent the growth of algae.
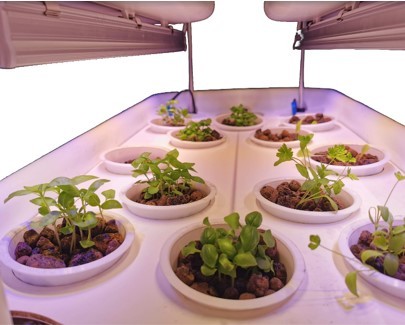
Always keep a net-pot and growing material in all plant places on the Plantsteps. This prevents light from entering the water, which can cause algae to form. The net-pots also prevents possible water splashes from getting out from Plantsteps.
If there are left empty places for net-pots you can cover them with aluminum foil.
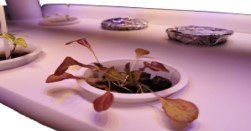
The water circulation of the system can be on all the time or it can be adjusted with a timer
-
Keep the water pump on continuously or by using a timer. Circulate the water at least 8 x 15 minutes a day, no breaks of more than 3 hours
-
The growth tips of the plant roots must not dry out or they will die
-
Always keep at least 30 liters of nutrient water in the tank, preferably 60 liters.
Adding water and nutrients once a week to system or according to plant consumption:
-
For seedlings, add one SupraMIX A and one B nutrient bag (2x 15g) to 60 liters of water. For adult plants, add two A and B nutrient bags (4x15 g) to 60 liters of water.
-
When using 100 g bags and 10% mother solution: add 50 ml of SupraMIX A mother solution and 50 ml of SupraNitro B mother solution for every new 10 liters of water
Grow light timing: 14-18 hours on per day
-
Use a mechanical meter to time the lights
Read more about our hydroponic nutrients
